
- Understand all of your network requirements
- Choose the right equipment for your wireless network
- Be aware of the network limitations of your devices
- Consider the various types of cables you will need to use
- Be aware of nearby interference that can impact your wireless access point installation
- Select a proper location for your wireless access point
- Measure signal strength before making final access point placements
Planning to perform wireless access point installation? Congratulations! You are in the right place. Keep reading to learn about some of the best practices for performing your AP installation. Before you begin, it’s important to know that there is more to WiFi than meets the eye, and things you may not consider, like where and how you mount the access point, matter a lot more than you think.
Wireless access point installation isn’t difficult but if you get it wrong, you will feel the pain. We’ve seen some really funky installations. We have heard horror stories from clients about so called “tips” that they received from self-proclaimed wireless service experts.
Our clients have told us that other providers recommended mounting access points at 45 degree angles. Or waiting up to 7 days for wireless signals to propagate within their office. Knowing that people have paid other service providers for such terrible advice is simply horrifying. We’re here to tell you the truth. Part 1 of our tips for installing wireless access points will focus on 3 key aspects:
- network requirements
- existing network environment
- physical installation.
Part 2 will focus on:
- advanced network configuration
- how to prime your wireless access points for peak performance.
Good WiFi isn’t hard to achieve. You just have to know what constitutes good WiFi and work within those parameters.
Whether you’re installing access points at a large office, home, warehouse or open area like a park or boardwalk, taking the following steps will typically leave you with a usable WiFi network that will stay connected and provide that bandwidth throughput that you expect.
7 Tips for Your Wireless Access Point Installation:
1. Understand all of your network requirements
Knowing your network requirements is perhaps the most essential stage of any WiFi installation. Think about how many people, or more specifically, how many devices, will be connecting to the network? What types of activities they will be doing online? Jot your notes down or even create a spreadsheet to capture your thoughts in an organized fashion. This will make the rest of these steps a whole lot easier.
2. Choose the right equipment for your wireless network
Once you determine your requirements, it’s a lot easier to find the right access point. The large selection can still present a challenge. There are so many options on the market that. Even wireless professionals find themselves overwhelmed trying to pick the best access point for their customers’ budget and requirements.
We have two words for you: finding MIMO. MIMO refers to the number of “ears and speakers” an access point has—how many antennas receive and how many antennas transmit. MIMO dictates how well the access point listens and understands signals that the client device sends to it, as well as its ability to send signals that are read and followed by client devices. There is 2×2 MIMO, 3×3 even 4×4. In short the more the better, but this comes at a cost.
In general, 2×2 MIMO comes at a much lower price range. 2×2 is enough for most low capacity, low density networks. Even most newer devices, save for certain high end laptops, can work with 2×2. For example, newer smartphones are compatible with 2×2, but most older smartphones are 1×1.
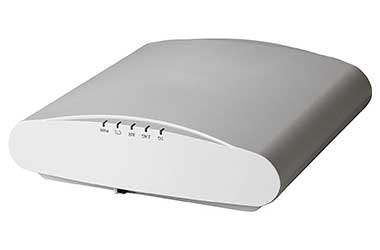
The type of access point you need will vary based on your environment and your budget, but we generally recommend current models that support 802.11ac wireless standards, can detect wireless interference and adjust automatically, and can support hundreds of simultaneous connections in high density environments. We always recommend enterprise grade wireless access points, even for residential deployments. (This wireless access point from Ubiquiti![]() should be suitable for most use cases)
should be suitable for most use cases)
Your equipment requirements will also vary based on the the type of environment you want to support and its unique needs. You may have to implement additional pieces of hardware, such as firewalls, switches and network controllers. This could be required in order to achieve the type of network performance you seek. Many factors, including the size of your location, the type of work you do over the Internet, and the devices you use, will dictate the type of network equipment you will need.
3. Be aware of the network limitations of your devices
It’s important to remember that network performance does not solely depend on your Internet connection and network equipment. The devices you use to access the Internet may also have limitations that you should take into account when planning your wireless access point installation. These limitations may prevent you from reaching that advertised throughput of the access point and, in some cases, will dictate how you configure your network in order to achieve the functionality you need.
These days, most networks are designed to support bring your own device (BYOD) policies. Don’t expect the same response from every device. The technology inside the device determines its ability to listen and talk to the access point as well as how much information can be transmitted and received.
Individual device needs will vary based on your industry and technological needs. We’ve serviced a tech startup office, where it is essential that the several hundred staff members can roam around the entire office and never lose connectivity, as their portable devices are uploading and downloading large files.
On the other end of the network requirements spectrum, a large warehouse required full coverage to support its scanning devices, which only support 2.4 Ghz connectivity. In both cases, we recommended the same access point, but configured them much differently. If we were to swap the configurations at both locations, laptops, scanners and productivity would come to a halt and we’d have some unhappy customers.
Other equipment limitations are associated with bandwidth throughput, wireless standards and more. Some equipment, even modern laptops and phones, may be limited with the amount of bandwidth they can realistically access, so it’s important to understand your own equipment and the type of work you expect to do before purchasing a high speed Internet connection or an expensive wireless network system.
4. Consider the various types of cables you will need to use
It’s weird but wireless Internet does require wires. At the very least, every single access point you use will require at least one cable, either for data connectivity or power. We typically recommend using POE (power over Ethernet) switches in order to deliver data connectivity and power using a single Cat5 or Cat6 cable.
Be sure that you choose access points with Ethernet ports that are 802.3af to accept standard power over Ethernet. Some manufacturers design their access points to only accept power from proprietary POE injectors or switches and this may cause issues for certain deployments by creating speed limitations, budgetary problems or by introducing new points of failure into the network.
The majority of access points require Cat5 or Cat6 Ethernet cable. We always advise spending a little bit extra on Cat6 cable, as it allows for higher speed throughput and offers less potential for crosstalk interference, caused by the construction of the cable. While Cat5 is affordable and absolutely usable, you may have to replace these cables in the future, as you upgrade your network. Cat5 and Cat6 cables do have limitations and typically can’t be run for longer than 100 meters.
Once you start approaching such distances, you have to implement additional technology such as switches or even wireless bridges. If long distance runs are required, you may elect to use fiber optic cable rather than Ethernet. Fiber optic cable is useful for installing a wireless network in a large building or spanning two properties. Fiber optic cable can extend your network by several miles but be prepared to pay! Running fiber optic cable is not cheap and should only be done when absolutely necessary.
5. Be aware of nearby interference that can impact your wireless access point installation
To understand interference, you first have to understand how WiFi works. Your access point is essentially using radio frequencies to communicate with your devices and transfer data in the form of packets. WiFi broadcasts on the 2.4 Ghz and 5 Ghz spectrum. Within those spectrums a few of the channels are typically used for WiFi. In North America, only 11 channels are available for use. The most popular ones are 1, 6 and 11 because they minimize co-channel interference. The 5 Ghz channel offers more channels and for this reason is becoming increasingly utilized.
Believe it or not, the biggest interference culprit in your network can be your own wireless access points. When deploying two or more access points, it is important to create a proper channel plan, so that your access points don’t interfere with one another. If you are in a highly populated area, interference from nearby access points and WiFi devices can be significant. Proper analysis of the spectrum utilization can help you ascertain the health of the airwaves and best channels to avoid interference.
If you are setting up a WiFi network in a rural area or in an isolated location without nearby commercial or residential buildings, chances are that you won’t have to worry much about outside interference impacting your network, as there simply won’t be other wireless networks around.
If you’re planning to install a wireless network in a densely populated city like New York, you’ll notice that there are dozens, if not hundreds, of nearby wireless networks. This can create an interference nightmare for your wireless access point installation. One way to see how many wireless networks are broadcasting around you is to simply check the available WiFi networks on your phone or laptop.
Every network you see, where it’s a strong signal or not, whether it is secure or not, its broadcasting a wireless signal that can possibly interfere with your network.
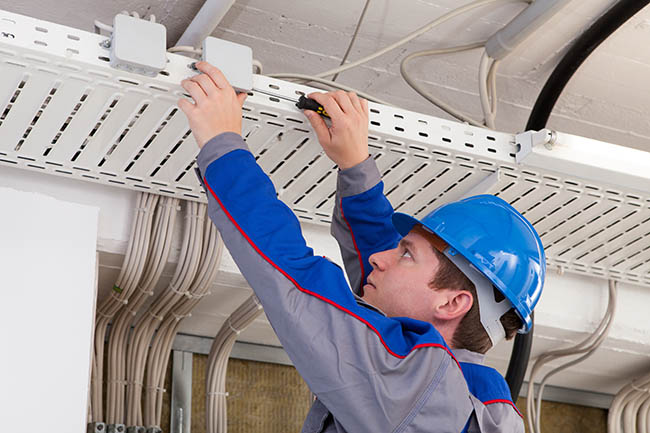
6. Select a proper location for your wireless access point
There is a common misconception that the best place to position your access point is somewhere central. This can be true in some cases, such as in small apartments or small offices under 1000 sq feet. However, in a world full of wireless devices, you want to have your access points in a place where people are going to be using those devices. This doesn’t mean you should put an access point in every room. It does prove that proper wireless access point installation requires proper planning.
It’s very important to follow recommended placement instructions when planning your wireless access point installation. Some access points are designed to be ceiling mounted. Others may work best on the wall and some may even work well on top of a desk. Some access points are sectorized and only broadcast wireless signals in a limited area, usually within a 30 degree or 45 degree range.
Be aware of your nearby surroundings as well. It’s preferable to mount access points in open areas, away from obstructions, like pillars. Other technology, like monitors or speakers can also have a negative impact on wireless performance. Avoid mounting access points behind any metal structures. Some examples include air conditioning ducts, wire meshes. Try not to place APs inside a drop ceiling unless aesthetics are critically important.
A single access point may not be enough to cover every inch of your office space. You may have to use additional access points in order to achieve the level of coverage you want. Remember to never place your access points too close to one another. This will only diminish the other’s performance levels.
7. Measure signal strength before making final access point placements
Drop that drill, buddy! Before you make any holes in your walls or ceiling, we recommend measuring the signal strength emitting from the wireless access point in every room you plan to connect to WiFi. The easiest way to do this is to download a WiFi analyzer app for your smart phone. Power up your access point and connect to it. Walk around your space and take note of the signal strength you experience.
Signals strength guidelines:
- -100 to -85 dBm – generally unusable.
- -85 to -60 dBm – can be used, but you may encounter issues and should consider supplementing your wireless network with additional access points.
- -60 to -40 dBm – just right and you will experience the strongest wireless performance when you’re in this range.
These seven tips are very general, and while they can be applied to most environments, it’s always recommended to work with a professional WiFi service provider, especially in situations where you plan to deploy two or more access points.
Plan the Perfect Wireless Access Point Installation
Choosing the right network equipment and installing it properly is only half the battle. Once the planning and physical installation phases are complete, you should be surfing the web wirelessly with ease. Though you may be satisfied with your wireless performance as is, it can likely be drastically improved with the right configurations. Look out for our next blog post, which will cover best practices for access point configuration. If you have wireless network installation needs that can’t wait for the next blog post, reach out to the wireless specialists at Made By WiFi. Learn more about our wireless network consulting services.